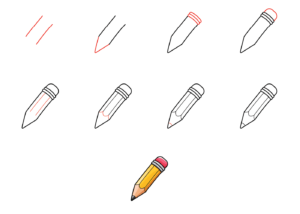
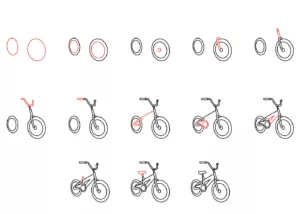
How to Draw Very Easy Bicycle for kids _easy drawing tutorial
How to Draw Very Easy Bicycle for kids _easy drawing tutorial Step 1: Step 2:- Step 3:- Step 4:- Step 5:- Step 6:- Step 7 Step 8 Step 9 Step 10 Step 11 Step 12 Step 13 Hey kids, did you like this How to Draw Bulma from Dragon Ball | Easy Step-by-Step? Practice it and you will see your drawing improve with every attempt. Also, share your view in the comment box, and don’t forget to share this art with your friends on Social Media so they can also enjoy it. For more such drawings keep visiting Storiespub.com. More Drawing Tutorials