Easy Drawing

How to Draw Squidward – Step by Step Guide

How to Draw Squidward – Step by Step Guide

How to Draw Squidward – Step by Step Guide In this section, we will go over how to draw Squidward from the Spongebob series. We will start with a pencil sketch of his head and work our way down to his body. To finish off, we will add in some shading to give him dimension. Let’s get started! First, start with a basic circle for his head. Next, add in two smaller circles for his eyes. For his mouth, draw a curved line that starts at the edge of one eye and ends at the other. Then, add two lines above his eyes for his eyebrows. Now let’s move on to Squidward’s body. Starting at the bottom of the head circle, draw a long oval shape for his torso. Then, add two thin rectangles for his arms. At the end of each arm, draw a small circle for his hands.

Read More »
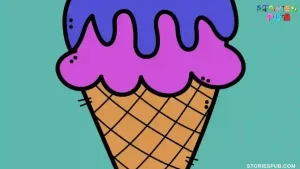
How to Draw Ice Cream Cone

How to Draw Ice Cream Cone | Step By Step

How to Draw Ice Cream Cone | Step By Step Drawing an ice cream cone is a great way to add a bit of fun to any drawing project. It’s also a great way to practice art fundamentals, such as shading and color theory. Whether you’re creating a charming illustration or just doodling in your sketchbook. In This tutorial to learn how to draw an ice cream cone! From the steps for creating the cone shape to adding details and accessories, we cover it all. So grab your favorite drawing supplies and let’s get started! 1. Begin by drawing a basic ice cream cone shape. Start with a small circle at the top and then taper it down into a cone shape. 2. Next, add some details to your cone. Include swirls or other designs on the side of the cone and make the top of the cone nice and

Read More »
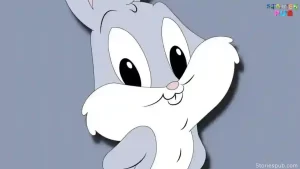
How to Draw Bugs Bunny

How to Draw Bugs Bunny | Step-by-Step

How to Draw Bugs Bunny | Step-by-Step Bugs Bunny is one of the most iconic cartoon characters of all time. He’s also one of the easiest to draw! In this blog post, we’ll show you how to draw Bugs Bunny favorite wascally wabbit step by step. Whether you’re a beginner or an experienced artist, you’ll be able to follow along easily. So grab a pencil and some paper, and let’s get started! 1. Begin by sketching a basic oval shape for the bunny’s head. 2. Next, add two small circles for the eyes and an even smaller circle within each for the pupils. 3. Just below the eyes, draw a curved line for the nose. 4. To create Bugs Bunny’s signature big teeth, start with a horizontal line across the mouth then add two vertical lines downwards from each end. Finally, connect the bottom of these lines with another horizontal

Read More »
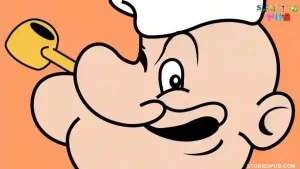
How-To-Draw-Popeye

How To Draw Popeye | Step by Step

How To Draw Popeye | Step by Step Popeye the Sailor is one of the most popular and well-known cartoon characters of all time. He first appeared in the comics in 1929 and has been a star ever since. Popeye is known for his strong arms, his love of spinach, and his devotion to Olive Oyl. If you’re a fan of Popeye or would like to learn how to draw Popeye character, read on for a step-by-step guide. Step 1 Step 2 Step 3 Step 4 Step 5 Step 6 Step 7 Step 8 Step 9 Step 10 Step 11 Step 12 Thanks For Reading This How To Draw Popeye | Step by Step Drawing tutorials Hey kids did you like this How To Draw Popeye | Step by Step? Practice it and you will see your drawing is improving in every attempt, also share your view in the comment box, and don’t forget to share this

Read More »
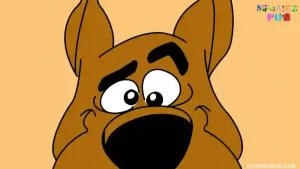
How-to-Draw-Scooby-Doo

How to Draw Scooby Doo | A Step by Step Guide

How to Draw Scooby Doo | A Step by Step Scooby Doo is one of the most classic cartoon characters of all time. He’s been around for decades and his popularity shows no signs of waning. If you’re a fan of Scooby Doo, you might be wondering how to draw Scooby Doo. Luckily, drawing Scooby Doo is not as difficult as it might seem. In fact, with a little bit of practice, anyone can learn how to draw this lovable dog. In this blog post, we will provide a step-by-step guide on how to draw Scooby Doo. We’ll also offer some tips and tricks on how to make your drawing look just like the real thing. So grab a pencil and some paper and let’s get started! Step 1 Step 2 Step 3 Step 4 Step 5 Step 6 Step 7 Step 8 Step 9 Step 10 Step 11 Thanks

Read More »
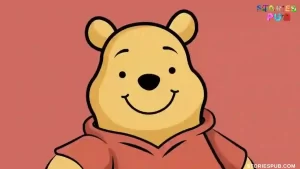
How-To-Draw-Winnie-The-Pooh

How To Draw Winnie The Pooh | Step By Step

How To Draw Winnie The Pooh | Step By Step Many people grow up with Winnie the Pooh and want to learn how to draw Winnie The Pooh. This guide will show you how to draw Winnie the Pooh step by step. First, start by drawing a large oval for his head and two small circles for his eyes. Then, add a small circle for his nose and two curved lines for his eyebrows. Next, draw a curved line for his mouth and two small triangles for his ears. Finally, add some details to his fur by drawing short, curved lines all over his body. 1. Start by drawing Pooh’s head. Use a large oval shape for the body and add two smaller circle shapes for the ears. Then, use a curved line to enclose an oblong shape for the snout. 2. Next, add Pooh’s features. Draw two small black

Read More »
How to Draw a Cherry Blossom

How to Draw a Cherry Blossom | Drawing Tutorial

How to Draw a Cherry Blossom | Step by Step Spring is in full bloom, and with it comes the beautiful cherry blossoms. These flowers have been celebrated in art and culture for centuries, and they make for a stunning addition to any drawing or painting. In this blog post, we will be teaching you how to draw a cherry blossom. We’ll cover everything from the basic shape of the flower to adding details like the petals and leaves. By the end of this post, you’ll be able to add cherry blossoms to any of your Spring artwork! Assuming you would like a step-by-step guide on how to draw a cherry blossom: 1. Begin by sketching out the general shape of the cherry blossom. Start with a small oval for the center of the flower and then add two slightly larger ovals for the petals. 2. Next, add some definition

Read More »
How-to-Draw-Tweety-Bird

How to Draw Tweety Bird | Step by Step

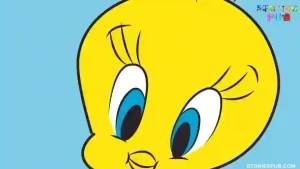
How to Draw Tweety Bird | Step by Step One of the most classic and beloved Looney Tunes characters, Tweety Bird is a cute and innocent little yellow canary. In this tutorial, we will show you how to draw Tweety Bird step by step. By following our simple steps, you will be able to recreate this lovable cartoon character in no time! In order to draw Tweety Bird, follow these steps: 1. Begin by drawing a small circle for the head. 2. Next, add two large oval shapes for the body and wings. 3. Draw a curved line across the middle of the oval shapes to divide them into upper and lower halves. 4. Within each half, add a smaller oval shape. These will be Tweety’s eyes. 5. Above each eye, draw a small triangle for the eyebrows. Just below each eyebrow, add a small curved line for Tweety’s beak.

Read More »
How-to-Draw-Ben-10

How to Draw Ben 10 – Step by Step

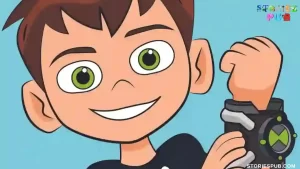
How to Draw Ben 10 – Step by Step Ben 10 is a popular American animated TV series created by Man of Action Studios and produced by Cartoon Network Studios. The show follows the adventures of a boy named Ben Tennyson who finds an alien device called the Omnitrix, which allows him to transform into various alien creatures. If you’re a fan of Ben 10 and would like to learn how to draw him, then you’ve come to the right place! In this blog post, we will provide a step-by-step guide on how to draw Ben 10. We will also include some tips and tricks to help you along the way. Assuming you would like a step-by-step guide on how to draw Ben 10: 1. Begin by drawing a basic outline of the head and shoulders. Add two lines for the neck and sketch the basic shape of the face.

Read More »
How-to-Draw-Hinata-Character

How to Draw Hinata Character | Step by Step

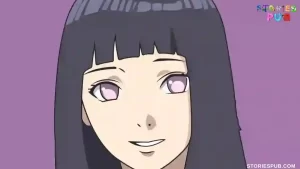
How to Draw Hinata Character | Step by Step In this blog post, we’ll be exploring how to draw Hinata character. We’ll go over her features step-by-step so that by the end you’ll have a fantastic drawing of her that you can be proud of. So grab your pencils and let’s get started! If you are a fan of the anime series Naruto, then you are probably familiar with the character Hinata. She is a Konoha ninja and a member of Team 8. In this article, we will show you how to draw Hinata from Naruto step by step. 1. Start by drawing the head and face. Draw a circle for the head and add the facial features. 2. Next, draw the neck and shoulders. 3. Then, draw the torso and arms. 4. Finally, draw the hips and legs. Step 1 Step 2 Step 3 Step 4 Step 5 Step

Read More »
How-to-Draw-One-line-Bird

How to Draw One line Bird | Step by Step

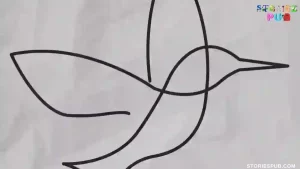
How to Draw One line Bird | Step by Step In this blog post, we will explore how to draw a one-line bird. This is a simple and easy method that anyone can follow. With just a few steps, you’ll be able to create your own beautiful one-line bird drawing. First, you will need a pen and paper. Next, you will want to start by drawing the head of the bird. Once you have the head drawn, you can then begin to draw the body. After the body is complete, you can then add in the wings. Finally, finish up your drawing by adding in the details such as the eyes and beak. Assuming you would like a step-by-step guide on how to draw a one-line bird: First, start with a small dot in the center of your paper. This will be the head of your bird.Next, draw a curved

Read More »
How-to-Draw-Shinchan

How to Draw Shinchan | Step by Step

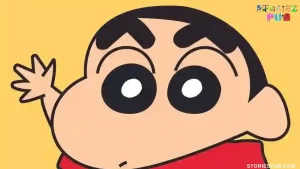
How to Draw Shinchan | Step by Step Guide In this section, we will be learning how to draw Shinchan. Shinchan is a popular Japanese anime character that is loved by many people all over the world. He is a five-year-old boy who lives with his parents and sister in the city of Kasukabe, Japan. Shinchan is known for his mischievous and naughty behavior. Now let’s start drawing Shinchan! First, make a small circle for his head and then add two big oval-shaped eyes. Draw his nose and mouth next. Add some details to his eyes like eyelashes. Now give him some hairstyle. Make sure to add his trademark black tuft of hair on his forehead. Shinchan has a small body so draw his neck and shoulders next. Then move down to his torso and sketch out his arms and legs. Finally, add some details like his clothes and shoes.

Read More »